Category Archives: Computers

gmail-crypt updates (key generation alpha!)

New Version

I’ve released a new version of gmail-crypt, my extension that allows OpenPGP/GPG encryption in Gmail through a Chrome extension. The biggest change in this version of gmail-crypt is the addition of key generation. This is a VERY EARLY stage key generation, the key ID’s are not calculated the same way as GPG, I’m currently not sure what the issue is. This means that it’s possible you’ll have to regenerate your key in the future!

Encrypted Email in 1 minute

The installation process is basically the same as the old version.

  1. Click Here for the extension.
  2. Click “Continue” when warned about the dangers of extensions
  3. Click “Install” when warned about the permissions for this extension
  4. In your browser click the Wrench(upper right hand)->Tools->Extensions
  5. Click “Options” under gmail-crypt
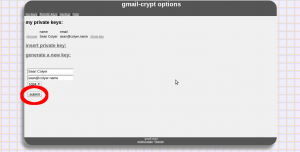
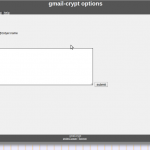
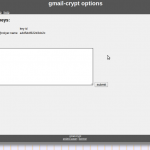
  6. Click “my keys” tab, then “generate a new key”
  7. Fill in your name and email, click submit
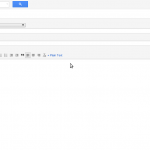
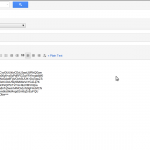
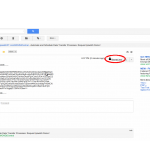
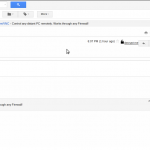
  8. Test it out by sending yourself an email in gmail and click the “encrypt me” lock icon, when receiving the message click “decrypt me” by the unlock icon.
  9. Get your friend to install the extension and see if you can send messages. NOTE: as indicated above, these keys may have to be regenerated in the future.

Concering JavaScript and OpenPGP

Since my last post, there have been several major changes regarding the OpenPGP javascript environment. GPG4Browsers was released, which performs a very similar function to what I am aiming to do. Appearance is the only real difference. GPG4Browsers has taken a different approach by having composition be a separate window rather than the integrated experience I am going for. I believe their design reflects a desire to be easily maintainable. In designing gmail-crypt I want encryption to require as few changes to user habits and as few clicks as possible.

GPG4Browsers however has a very strong javascript base for their code. The other major change has been the creation of the OpenPGPJS project. GPG4Browsers creators and most of the contributors I had mentioned previously and myself have decided to team up to work together to bring a unified OpenPGP JavaScript library.

With the looming creation of a unified OpenPGP library, I will perform minimal work for the time being on my js-openpgp code as I believe it will be rolled into the larger project and then used in this project. The extension has other work that needs done (Options page rewrite, stop draft uploading, allow any text to be encrypted/decrypted)

Hope this can help someone! Let me know other ideas you might have..

Introducing gmail-Crypt

I’m proud to introduce gmail-Crypt, my new project bringing OpenPGP to Gmail and Chrome via an extension. The project is Open Source, under a couple of different licenses because of the code coming from various sources.

In my experience, most of the existing options for OpenPGP/GPG/PGP are archaic and do not work well with how people use computers today. I think that we can create a simple experience with tight integration in the browser that can make encryption much more accessible.

The project is in very early stages right now, and the current version is definitely an alpha. However, I wanted to put a version out there. Please note that this is still being developed and may not yet be suitable for your super secret needs, as noted in the license there is NO WARRANTY of any sort associated with this software.

Install/Use

  • Click here to add the extension to chrome. It will ask you for permissions.
  • Open the Options page for the extension
  • You currently need to provide your own OpenPGP/PGP/GPG key. I hope to include key creation in a later version. Paste your private key into the box on the “my keys” options page. (You need to paste an armored version of your key. If you’re running linux try “man gpg” for more info)
  • Add keys for your friends (or your own public key) in the “friends keys” section of the options page.
  • Go to your gmail inbox. Compose an email to someone who’s key you’ve added. Click on the “encrypt me” in the upper right. *Note there is currently an issue where sometimes this will not display, try refreshing the page if this is the case.
  • If you receive an encrypted message, click on the “decrypt me” in the upper right of the page.

Send me mail!

You can send me encrypted mail if you want to test it out. sean @ colyer . name.

-----BEGIN PGP PUBLIC KEY BLOCK-----
Version: GnuPG v1.4.11 (GNU/Linux)

mQENBE61VRoBCAC9vxgdovC2KBqyhTzK+dAuT+5S2H5rjQY8gKBjW+ta2eSn/3Ts
Hjq0caeXR4mTualfbQbzv3k9ptDHd4wUNKftFegDxQTsExkrlluhB2asLfXcd7G+
Q3PF4M3R6tXdQo//ioW+zlvfK7fiQ7AaWLXfGBip60Z0OSABbRvRWB/TvouwMUtm
GzpT12LILPD19D7Gy6WpqQTyvEBhEBEp44x5jtFVSBKjJ+zsPmy6DvaBRtc27c87
HPwvlObybCE67EX793QyFsl4MVMYEkGSdprGuaT53pYJSMOKxpEo9M9EzsxZFhQV
QAhQQpao+aYKzdlvNjLOcJaTNADJ/ZywsjC1ABEBAAG0HlNlYW4gQ29seWVyIDxz
ZWFuQGNvbHllci5uYW1lPokBOAQTAQIAIgUCTrVVGgIbAwYLCQgHAwIGFQgCCQoL
BBYCAwECHgECF4AACgkQ5ymGNfSQhKrbQggAjbQ2SwtDki1H0RYBZKCNMMGf6CnX
r9gKTK6/0ipesUBTkptE5rXQK9X7dwDcybCY/EfUlSq/ww+auqs4byUlV5W78ARn
k4TUEiCkvO+gDY5xFzMHHF3vBTbFU3yA8moQKuZrNXkTcawjSSuiWk0asf7yerQf
Qfg5Bql2EUFiLGjFZEc63KZcu0GEDReu71fUVopzeSq4TeibniQwPkrrY0aJIBVS
iKZebl3wfh2hdqWu0Wf684Y5FrvRmTGWYjfG7Fde4DhpiZq5NkMExkO0kmwTBns2
Uv0LxCgGwQ8jY7M7OzmHjXGxjwqUkAiemvSgVMNA9BnydTrecCk3IiYLw7kBDQRO
tVUaAQgAzSkx8VEIq9z5h5CTCxdx9K3aRInUKB4PUTaAcYYF8GbdmBPMQUdK+shx
uzllqf16bCtrDHvW/c27msyslp8a/S65HjtmpTZ8EudchAKOR+uLk1+tVRBcxYlb
nSfELcJcxjpLr3Y1uH202EAzKn1apmEFwLD+PhB+VqagKME2SIfNc/ArISXXsOgb
+r8BIIZD8aU0gAtvagpnnSM2LAQP5Q3pCzZkrsBpfNq30tMbn4Yynk/wEg5UA1fn
UVAxJjYtENKWxy+enmJHNM6a13nmNQFSXHG1ss0hSWqMoWPTNAO8fZH9/M/v25Ys
hs99D/tdZDawttAdQAsiqKR8DasgEQARAQABiQEfBBgBAgAJBQJOtVUaAhsMAAoJ
EOcphjX0kISqxUEH/i2wSbM746gKB5qYAuCWCCqf8yzk8Rkc1Cu00nS5wT+V7Dyt
BCZvBuDKkNSgtRi+lALPmOARzJoIhwrBIG9ERf9vgDeBonEyMKYkYWOisMR7Qwh6
r35knJJZ4RZVrk7VVRJcEws5Li77IOOR6RXNFS2plwq1LIMAhlt+ocVIEQLBhUjk
N1Eksx0M6JCOy0pMm6srd4VoFZW6tVzD/vXPzcZLuy3Yfy6cfomWE93xpkbA9KOO
+uqtgxDYf2yg3PTkGIrqNDxE6yVkGBv2+XQ1TQDNwKMDpvPWHJIfvXHPd0NkpANm
Zm+3euyYoSme/3eKjpWfbhZOtmSyfM7Qo7WCbZk=
=8Sql
-----END PGP PUBLIC KEY BLOCK-----

Developer Details

jsOpenPGP

I’ve decided to dub the JavaScript OpenPGP library for this project jsOpenPGP. It aims to be an independent library that can be used in other projects as the library to provide OpenPGP encryption. Currently it supports RSA/AES/SHA/CAST5 encryption/decryption. It does not yet do message signing or key creation.

By combining the work by Herbert Hanewinkel and Tom Wu, we are able to create a powerful library. Both of these libraries had to be modified to work together, and the OpenPGP code was mostly re-written to provide a more object oriented approach and some code simplifying that I believe will make the project easier to build on.

Architecture

The project takes advantage of the “walled garden” approach to extensions. Through the use of a content script, there are changes made on the gmail page, which also interacts with a background page that serves as the middleman between the extension backend and the gmail front end. This is necessary because we want to store key information in the context of the extension, and this allows a certain level of protection between the gmail page and the key details in the extension. Google provides a good overview of this architecture.

Related Works

  • GPGTools is working on using a JavaScript implementation of OpenPGP for a mobile app.
  • Thinkst has released an extension that performs a very similar feature. However, rather than using a Javascript implementation, it uses a user-installed GPG binary on the local filesystem.
  • FireGPG used to be very similar. It runs only in FireFox. It has stopped supporting Gmail

Todo

There is a lot of work still to do. Things I’d like to accomplish include: Key creation, key signing, find a good draft uploading solution, further integration with the browser, bugfixes. Check out the latest source for most recent details.

I would love help, head on over to the project page if you can help out!

HOWTO: Fix Windows 7 Profiles (desktop icons not load)

My desktop machine (Windows 7 Ultimate 64-bit x64) recently stopped loading icons when I logged in. The start menu and and everything seemed to work except my Desktop.  After scouring the web there seemed to be a few proposed solutions:

  1. System Restore
  2. Explorer isn’t running/ registry WinLogon or userinit.exe isn’t properly set
  3. Too large files on Desktop (I can’t find this link now, but most of these are in multiple places)
  4. Create New User and import data from the old profile

These weren’t good for me.  System Restore is never ideal, it’s just rolling back to before you made some unknown mistake, and you’ll probably lose stuff on the way. Explorer was running and userinit.exe was running.

I was also tipped off that this was an issue with a local user profile because I had another user account that was loading fine. I didn’t want to create a new user and import data because there are lots of settings and things attached to this account, it also just seems like a messy way to fix this.

How I fixed it, in the registry:

HKCU/Software/Microsoft/Windows NT/CurrentVersion/Winlogon set FirstLogon to 1

rename HKCU/Software/Microsoft/Windows to HKCU/Software/Microsoft/WindowsOLD or something like that

Log out and log back in.  This will create most of a clean explorer/windows profile.  The one issue left is preferences don’t seem to save properly (file associations, taskbar, etc…)

The way I fixed this was to export HKCU/Software/Microsoft/Windows/CurrentVersion/Explorer from a clean profile.  Log back in to your original profile.  You have to delete HKCU/Software/Microsoft/Windows/CurrentVersion/Explorer in your registry; As far as I can tell you can’t edit these values regardless of permissions, but it will let you delete the whole directory (Nice one MS). Then import the version you exported previously, log out and log back in.

You will lose a few things — generally settings in Explorer (file preferences, themes, etc..) unfortunately.  I didn’t really feel like chasing down specifically which values got corrupted in mine, but if you were to look within the Windows registry folder addressed above and fiddle it could probably be found without too much effort — I was fine with basically reseting my explorer profile.

Hope this helps someone, if something I said is unclear feel free to ask for clarification.

Snow Leopard, 7, and Ubuntu, Oh My!

Being home from school for the break I took it upon myself to finally upgrade my macbook from Mac OS X 10.5 (Leopard) to OS X 10.6 (Snow Leopard) — intended to be a relatively trivial upgrade, I somehow managed to stumble the whole way through. This was the last of my 3 Operating Systems to be upgraded (XP -> 7, Ubuntu 9.04 -> 9.10).

Important and Helpful things I learned or used in this exercise:

Preparation

WARNING: there are commands in here that if used improperly can do serious damage to your install, tread lightly. BACKUP your home directory.  Use an external hard drive and run something like:

rsync -ahv –delete –exclude=/Downloads/ –size-only ~/ /Volumes/BACKUPDrive/username/ From the Terminal in your home directory. (Apple or Command key + Space to bring finder search type terminal in this window).

Running the Snow Leopard disc yielded my major issue: My Mac disc showed a yellow triangle and wouldn’t let me use my mac drive for the upgrade. Following a note I had seen online, I used Disk Utility (on the booted SL dvd) to resize the partition — DOES NOT WORK WELL —  it in fact seemed to mess up both of my other installs (win7 and ubuntu 9.10), uggghhh.

Accepting the inevitable and having backups of my data, I decided to run with this, I took the opportunity to clean all of my installs.

Partitioning

From here, I believe I made two mistakes.  My first mistake was when I repartitioned my drive I created 3 partitions, one large one for OS X and 2 smaller ones for the others, but I didn’t format them, just left them as free space.  For some reason I believe this messed up how the computer decided to boot from them, it was like the GPT/EFI support with MBR got somehow confused.

The way you should partition for triple booting a mac is to use the command line it seems with something like:

diskutil list This should yield the drive and volume number you need for the next command

sudo diskutil resizeVolume diskDRIVENUMBERsVOLUMENUMBER 80G “MS-DOS FAT32” “Linux” 15G “MS-DOS FAT32” “Windows” 15G This seems to be the best way to re-size.

From here you should be able to continue installing your operating systems of choice. rEFIt is the best way to triple boot, it should be installed now if it hasn’t already been.

Installing Linux / Ubuntu

My second mistake: the most important thing to note in Linux is to install GRUB to the Linux Partition rather than the MBR (default).  In ubuntu, near the end of the install there is an advanced options tab which will allow you to install it in the local partition, you want to do this.

If however, you are dumb and mess up like me, you have to fix this later, because windows and linux will fight and will result in only one being bootable.

grub-install /dev/sdaPARTITIONNUMBER will install GRUB to your needed partition.

You will also want to delete the GRUB MBR entry (alternatively, install Windows at this point which will overwrite it without asking). This is a little more interesting:

The Power of dd

dd is a very powerful and useful command, I ended up using it for several different things during this installation. dd provides relatively low level access to disk reading and writing functions. BE VERY CAREFUL TO GET PROPER if= AND of= ARGUMENTS.

dd if=/dev/zero of=/dev/sda bs=440 count=1 will clear your MBR. (OS X equivalent would be of=/dev/disk0 however it doesn’t let you do this to that partition.  I saw reference to using fdisk on the /dev/disk0 partition (the 200mb EFI partition), but I’d like to avoid that if possible. DON’T GET THIS ONE WRONG, and backup the MBR by basically inverting making if=/dev/sda and of=/path/to/backup.efi

dd if=/dev/disk1 of=/whereveryouwant/DiskImage.iso bs=2048 is a good way to make ISO images of CD’s/DVD’s (use diskutil list to verify if=/dev/disk1 )

dd if=/whereveryouwant/DiskImage.iso of=/dev/disk2 bs=1m    is a good way to make a USB drive boot an image. (use diskutil list to verify if=/dev/disk1 ).  ***This will almost certainly wipe whatever is on the USB drive (/dev/disk2) so make sure you don’t need whatever is on there.  Under OS X this is the best way I’ve found to make bootable USB flash drives.

Back to the Point

Avoiding redundant GRUB entries avoids refit from displaying phantom legacy OS boot options, or extra linux options. Installing windows will overwrite the MBR and you should be able to boot from any of your operating systems.

How to: Bypass Windows 7 Upgrade “Key is Not Valid”

If you do things as terribly out of order and with partitioning as I did that you need to reinstall windows, you might come across a windows upgrade issue.  Windows 7 has a new way of verifying if you are using an upgrade DVD — rather than asking you to input an old CD or DVD, it will look on your system for pre-installed versions of windows. However, having just formatted everything this is an issue.

Solutions: 1) Reinstall XP/Vista (NOT IDEAL). 2) Plug in external or other hard drive with XP/Vista Install (NOT IDEAL).  3) Install Windows 7, make it through the install to where it asks for your key.  If you put in your key (and you’re sure it’s correct) and it says “key is not valid” (Note: this is in the initial key entering, not activating), then you seem to have no way forward.  However, if you reboot and relaunch the installer, Windows seems to detect the install you just created as a valid install, which will let you input your key the second time without harassing you.

Other Useful Tools/Notes:

rEFIt has a partition tool.  This is a way to use gptsync, and this is very useful. There were a few situations I needed it in, sometimes you have to help the computer sync MBR/GPT. It will basically auto correct differences in the table that it detects.

gparted is a useful linux tool for partition management.  I needed this for a few small things and it can help point to where your issues are.  There is a live image or you can find it on most live distributions (ubuntu).

To answer why, after all this I triple boot rather than virtualize… I’m running an old 32-bit Core Duo macbook — I don’t believe they have the Intel Virtualization Technology. More importantly, I use Ubuntu generally for certain low level tasks (i.e. Wifi card in promiscuous mode). I use Windows for (limited) gaming/weird hardware access and most of the solutions that port graphics don’t support my chip (VMWare Fuzion).

I’m sure this process ended up being far more painful for me than it needed to be, but I’m back to happily triple booting.